Hands-On Activities for Kinesthetic Learners
Autumn is here! The air is getting crisper, the leaves are changing color, and we are looking forward to all the traditions of the season! Many of those seasonal traditions in our home involve pumpkins – decorating, crafting, painting, eating… we are all about pumpkins!
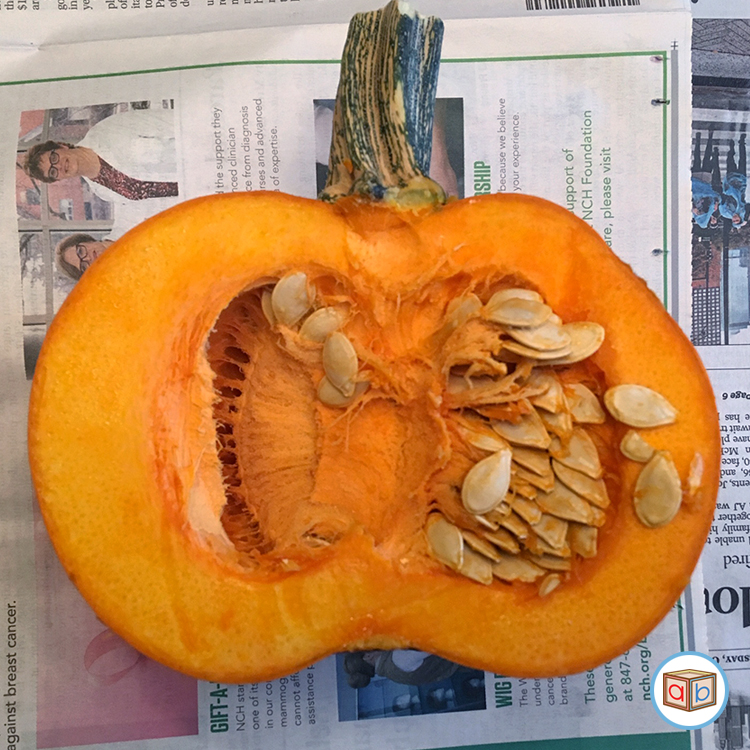
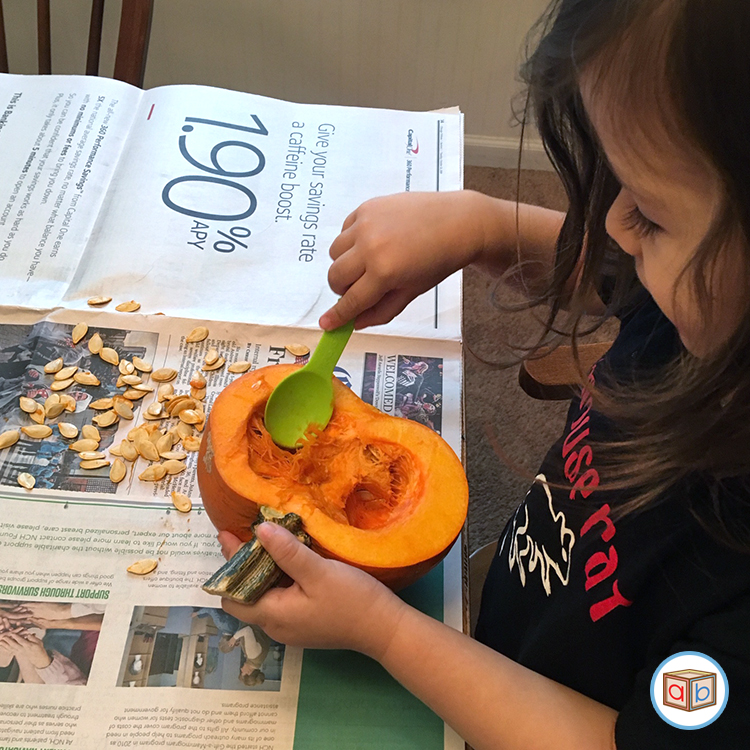
A favorite activity for my kids is Pumpkin Exploration. It’s a simple activity that is perfect for kids who like to get their hands messy and can easily allow for some additional education like counting and language-learning. We make a trip to our local pumpkin farm, taking our time to enjoy it and have fun (maybe even take a hay ride or pick apples if still in peak season!) and once we get home, we wash up and get ready to explore.
What you need:
🔹 A small pumpkin
🔹 Some newspaper to protect your work surface
🔹 A spoon for scooping
🔹 A bowl for collecting the seeds
What you do:
🔸Cut the pumpkin in half
🔸Explore the inside of the pumpkin, with hands or spoon
🔸Count and remove seeds and place in the bowl
🔸Play with, remove, and discard pulp
Language-Booster:
While exploring the pumpkin, talk about what you see: seeds, pulp, and flesh. This is a perfect opportunity to introduce or review vocabulary, discuss how plants grow from seeds, and think about where healthy foods come from.
Math:
Count the seeds you find in the pumpkin, compare quantities (how many seeds were in one half? how many in the other half? which number is greater? etc.), and make number groups (groups of 5, 10, 20…).
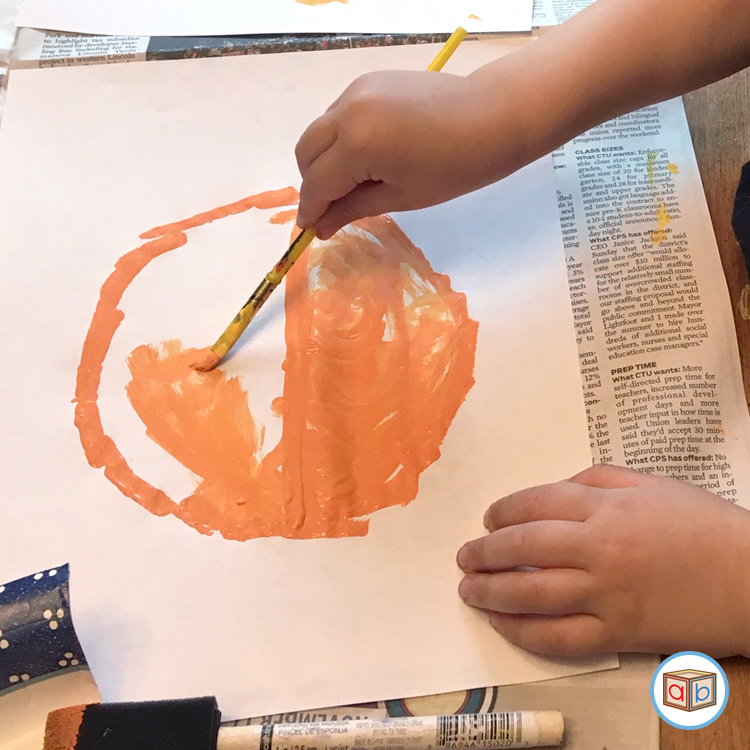
Pumpkin Diagram
After my kids are done exploring their pumpkin, we discard the pulp and clean the seeds, and we make our own diagrams to record what we learned. You’re going to want to keep your surface covered in the newspaper for this activity, too.
What you need:
🔹 A piece of blank paper
🔹 Some orange washable and non-toxic acrylic paint
🔹 A paint brush
🔹 Cotton balls
🔹 Liquid glue
🔹 Clean pumpkin seeds
What you do:
🔸Paint the shape of the pumpkin on paper
🔸Create “pulp” by gently stretching out cotton balls, and paint orange
🔸Glue “pulp” and seeds inside the painted pumpkin shape
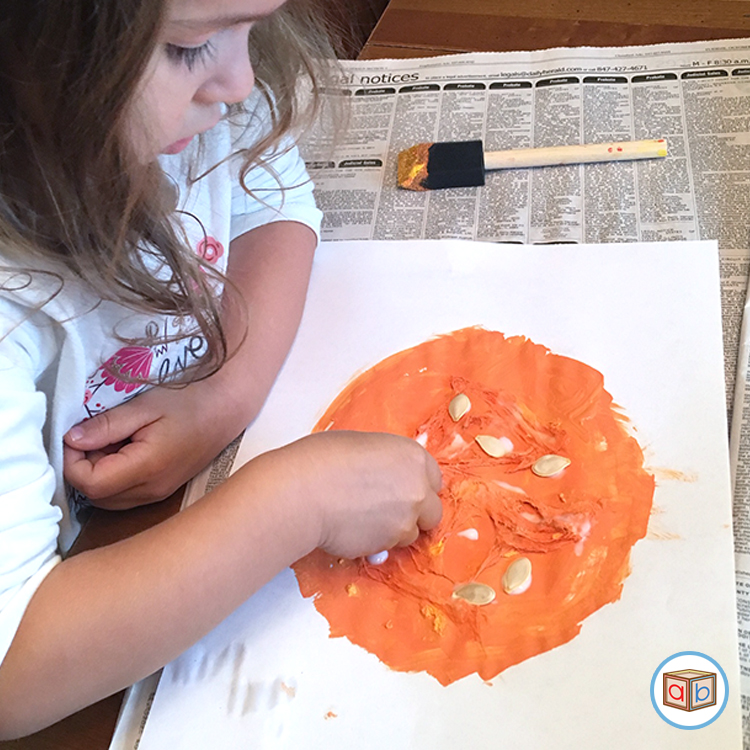
Making a diagram is a great way to retain information and record observations made during the exploration activity, while exercising creativity, and allows your child to look back on the activity at a later date to recall what they learned. It’s a great introduction to the scientific method!
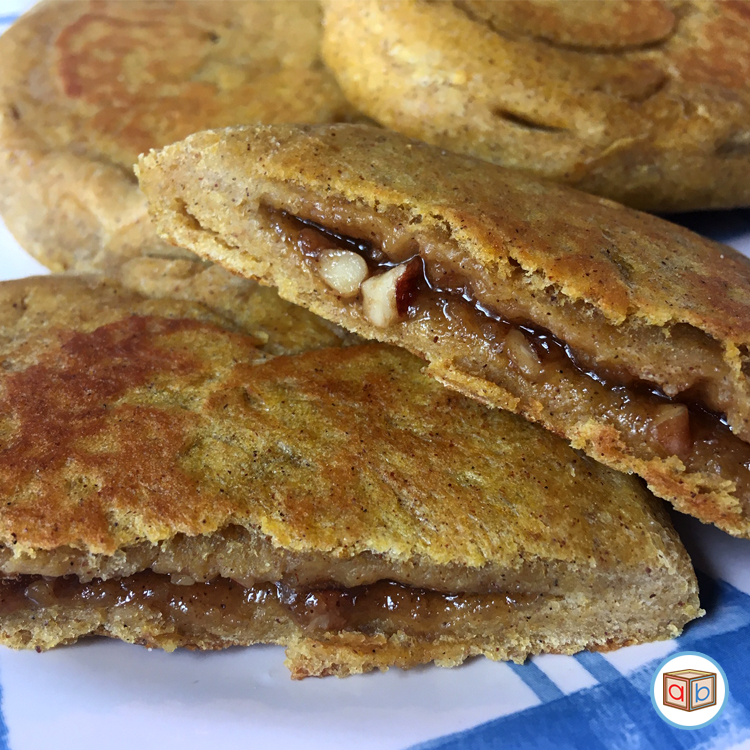
Pumpkin Spice Hotteok
While the glue on the diagrams are drying, we prepare to cook the pumpkin. There are so many wonderful pumpkin recipes out there, so take your pick! This time, we made Pumpkin Spice Hotteok (호박 호떡).
Making pumpkin puree is super easy and can be used to make a variety of delicious foods. Hotteok (호떡) is a popular Korean pancake filled with sweet syrup and nuts, perfect for chilly days – and when combined with pumpkin and spices, is a delicious fusion between Korean and American flavors.
To make the pumpkin puree, make sure the outside of the pumpkin is washed well, sprinkle the flesh with some salt, and place cut-side down on a baking sheet covered in parchment paper. Roast the pumpkin in the oven at 400 degrees F until easily pierced with a fork and the skin pulls away from the flesh (45 to 60 minutes). Once cool enough to handle, process with a food processor or blender until smooth. That’s it! It’s ready to use in your favorite recipe!
While still warm, we used our fresh pumpkin puree in our Pumpkin Spice Hotteok recipe, and topped it with whipped cream, maple syrup, and honey butter. They were absolutely delicious and helped to close our day of activities!
Taking the kids through all three activities, from whole pumpkin to tasty dessert, helps them to appreciate that journey from farm to table. They get to be involved in every part of that journey with these exploration activities: picking the pumpkin, exploring the fruit, recording their observations, and even cooking! And along the way they practice math, language, science, and art. It’s a well-rounded educational experience perfect for an autumn Sunday!
I hope you and your kids have fun with these activities, and that they can become a tradition in your home, too. Until next time!